Video Converter Ultimate for Mac User Guide
Video Converter Ultimate for Mac is an all-in-one multimedia management program for Mac users to convert videos/audios between different formats, extract audios from videos/DVD, download Web videos, burn videos to DVD, copy encrypted DVD to Mac and rip DVD to videos on Mac OS X. This user guide will show you how to use this total Mac video converter bit by bit to make videos/audios/DVD much more convenient and easier to share and distribute.
Free download Video Converter Ultimate for Mac here. (For Windows users, please check Video Converter Ultimate for Windows.) Install and launch the Mac video converter, you'll see the following interface which allows you to select an output option:
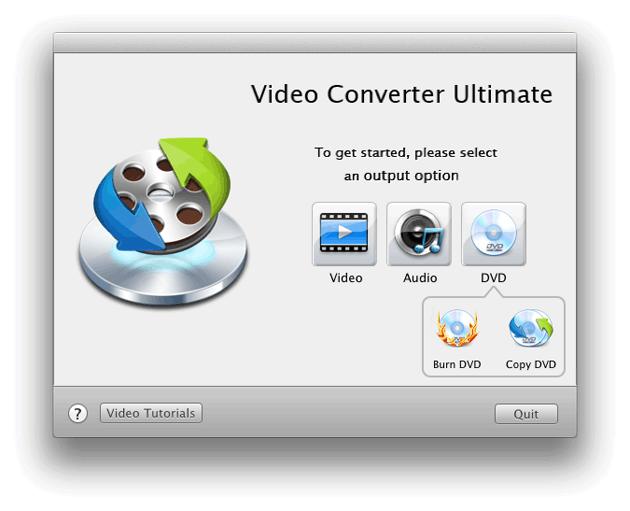
To output videos or audios, you can click the "Videos" icon or "Audios" icon, while, to burn or copy DVD, click the DVD icon and then select "Burn DVD" or "Copy DVD".
If you want to see Video Tutorials of this Mac video converter, just click the "Video Tutorials" button. 5 video tutorials are available for you to learn how to use this program fast: Getting Started, Convert Video, Convert Audio, Burn DVD and Copy DVD.

I. Output Videos
To output videos, just click the "Videos" icon in the "set output option" interface to enter the video output window below.
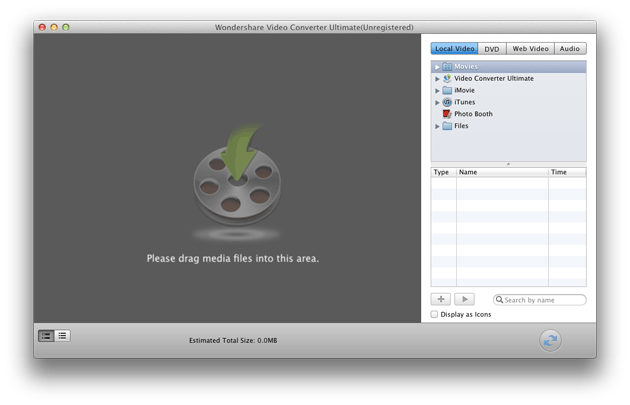
Load DVD or import video files
There are 3 methods to load DVD and import video files:
- 1). Click the "Import" --> "Load DVD..." or "Add video files" menu in the menu bar to locate the files in Finder.
- 2). Browse the files in the top-right panel, highlight the corresponding files in the bottom-right panel and then click the "+" button or drag the files directly to the left panel to import files.
- 3). Drag files or folders from finder or desktop directly to the left area.
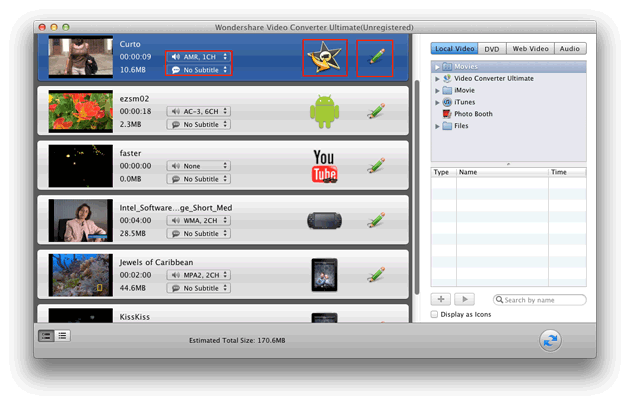
When the files are loaded, you can play the videos with the built-in player by clicking the video thumbnails, select your favorite audio tracks and subtitles for your output files, specify output profiles by clicking the device or application icons (as the above iMovie, Android icon), and make easy video editing by clicking the pencil icon.
Set output files
In the pop-up output settings panel, users are allowed to input "Output Name", select output video profile from the drop-download list, further customize profile parameters (including video/audio encoder, output resolution, frame rate, video/audio bit rate, audio sample rate and audio channel, etc.) by hit the "Options..." button, save the custom profiles for use next time with "Customize" or "Apply Current Setting to All Files"

Edit videos (OPTIONAL)
- Merge Videos: To merge several videos into one file, highlight the files that you want to merge, and point to "File" --> "Merge" --> "Merge Highlighted" or directly click "Merge All in One" to merge all the imported files into one video.
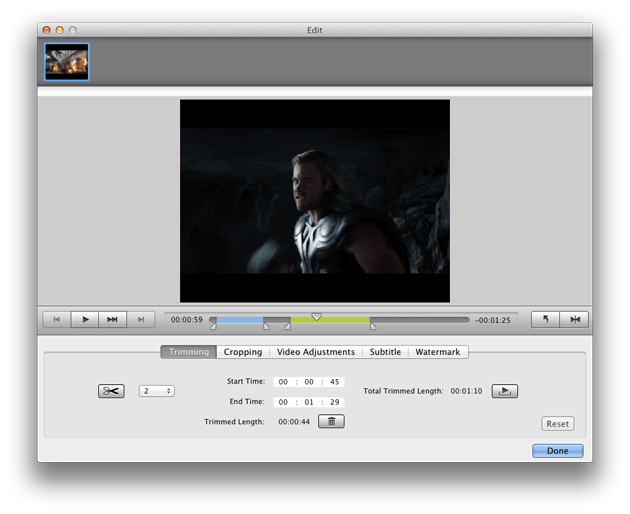
- Trim Video: By clicking the pencil icon, you will enter the "Edit" window, the default tab is "Trimming" for users to cut unwanted scenes.
- Crop Video: Under the tab "Cropping", you can crop unwanted black edges by moving the position slider or by dragging and dropping adjustment handles.
- Adjust Video: With "Video Adjustments", this video converter enable you to apply special video effects to output video, adjust video "Brightness", video "Saturation", video "Contrast" & audio "Volume" and select the deinterlance mode.
- Set Subtitle: If you want to import/select subtitle, set subtitle font & encoding, and adjust the subtitle position, "Subtitle" tab will help.
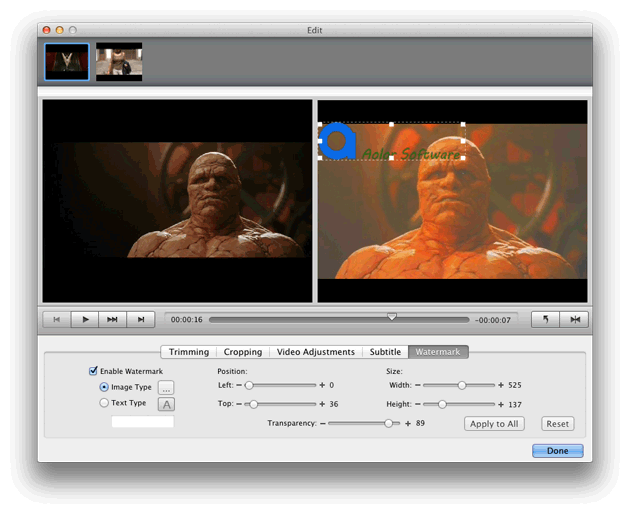
- Add Watermark: "Watermark" tab works for you to credit your video with text or image watermark.



Start conversion
When all the settings are done, just click the conversion button  to start to convert videos.
II. Convert Audios
The operations of audio conversion are almost the same as the video conversion. The only difference is the output profiles. There are "Ringtones", "Lossless Audio", "Pro Audio", "Music Players" and "Command Audio" predefined for you to select. Of course, you can also customize output profiles for your special needs.

III. Download Web Videos
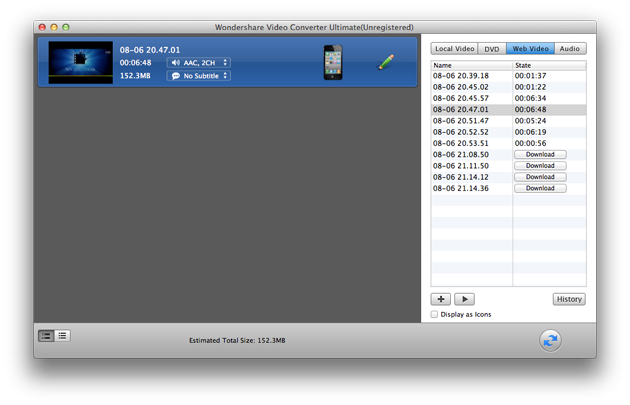
It is rather easy even for a novice to download online videos with this Mac video converter. What you need to do is to open the "Web Video" Tab and visit the page in your Safari that has the video you wanted. Then the software will detect the video automatically, and display it in the list. Just click the "Download" buttons to download the videos.
V. Copy & Burn DVD
In the burning interface, you are allowed to burn the imported videos or copy the imported DVD files to (blank & writable) DVD disc, DVD folder, .dvdmedia or ISO file. When all the settings and editings are done, click the "Play" button to preview the DVD project, and the "Burn" button to start burning.
