Data Recovery User Guide
Data recovery allows users to recover deleted files in two modes: Wizard Mode and Standard Mode. Wizard Mode is for beginners without data rescue experiences to retrieve deleted files by answers two simple choice questions, while Standard Mode is for experienced users with advanced settings. Just get started by following the simple data recovery steps below:
Download, install and launch the data recovery software
IMPORTANT: Don't install this program on the disk where you lost your data, in case the data is overwritten.
Recover deleted files in Wizard Mode:
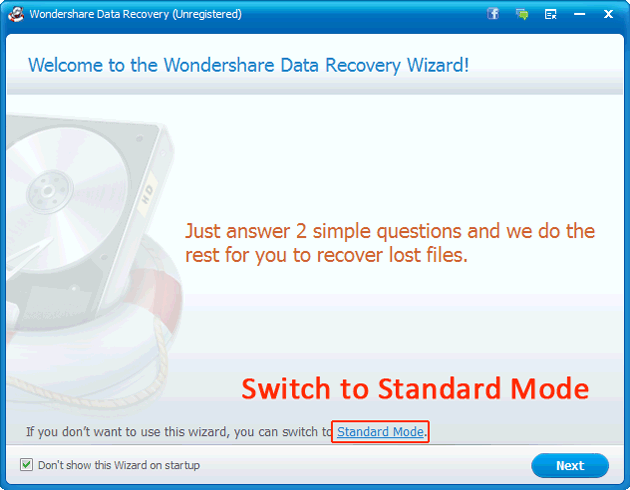
When starting the data recovery tools at the first time, you will be led to the Wizard Mode. On the main interface, it's easy for you to switch between Wizard Mode and Standard Mode.
Choose the file type you want to recover.
Click the "Next" button on the starting interface of Wizard Mode and answer the first easy choice question: What type of files do you want to recover?
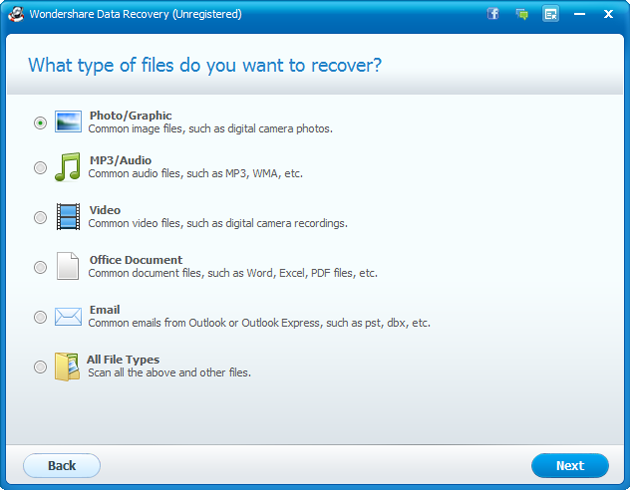
This data rescue software supports retrieve all kinds of files: image files (like photos and graphics), audio files (as MP3, AAC music), videos (from video cameras, camcorders, etc.), documents (including Word, Excel, PowerPoint, PDF files) and emails (of Outlook or Outlook Express).
Just choose the file type that you want to restore. If you want to recover various file types, choose the option "All File Types".
Specify the location of your lost data.
In this step, you can tell the program where the data is lost. If you know exactly where the lost files are, click "Browse" to specify the location.
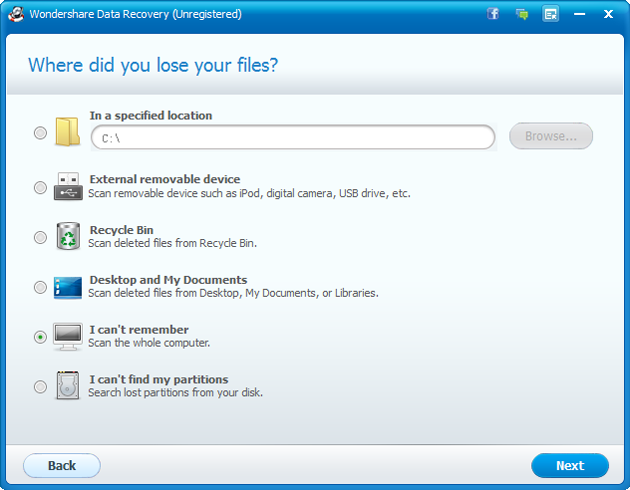
Choose "External removable device" if you want to retrieve deleted files from external storage media like digital camera, camcorder, tablet PC, mobile phone, MP3 player, USB drive, Flash drive, memory card, etc.
Choose "Recycle Bin" to scan deleted files from Recycle Bin. Choose "Desktop and My Documents " if you have deleted the files from your Desktop, My Documents folder or Libraries.
If you cannot remember the location, select "I can't remember", this program will scan the whole computer, which is obviously to take more time. If you cannot fine the partitions, just ask the program to search lost partitions of your disk by choosing "I can't find my partitions". Click "Next" to move to the next step.
Start to scan the lost data
Just click "Start" button to begin the scan of the lost files. In this step, there are 2 optional check boxes: "Enable Deep Scan" (working well for formatted recovery) and "Enable File Recovery" (working well for photo recovery).

Preview and recover lost data.
If you have chosen "All File Types" in step 1, the files scanned out will be displayed by file types under the "File Type" tab. It is easy for you to preview the found files and select your wanted ones quickly with the preview feature. Documents like Word, Excel, PowerPoint, PDF, Web pages files, photos and RAR, ZIP archives can be previewed before recovery.
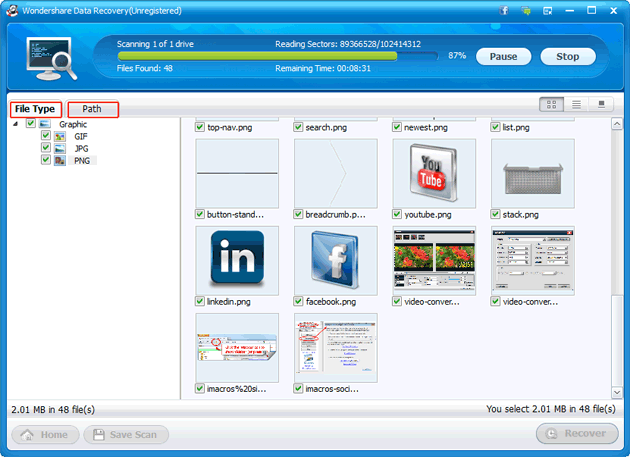
By switching to "Path", you can selectively recover data of certain paths.
In addition, if you want to find the files quickly, you can search file name or path in the filter bar. "Save Scan" if you want to recover later.
IMPORTANT: Do not save the scanned files to the location where you lost your files to avoid being overwritten.
Recover lost files in Standard Mode:
Switch to the "Standard Mode", you will have 4 options: Lost File Recovery, Partition Recovery, Raw File Recovery and Resume Recovery.

Lost File Recovery
Lost File recovery is to recover deleted and formatted files from a partition or removable media, such as files deleted with shortcut "Shift + Delete" or emptied from Recycle Bin.
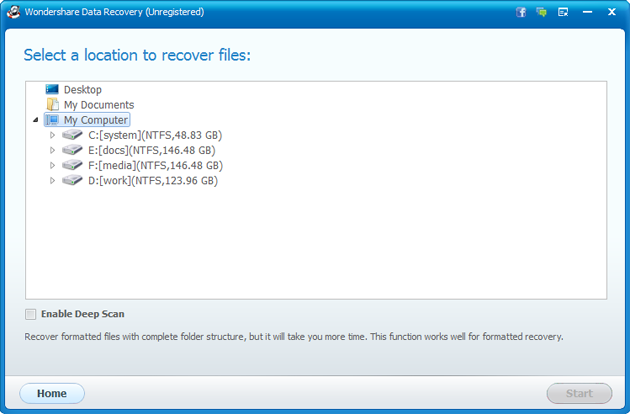
Select the location (disk or folder) of your lost files and click "Start" to begin scan. The rest of the procedure is the same as the step 4 in Wizard Mode.
Partition Recovery
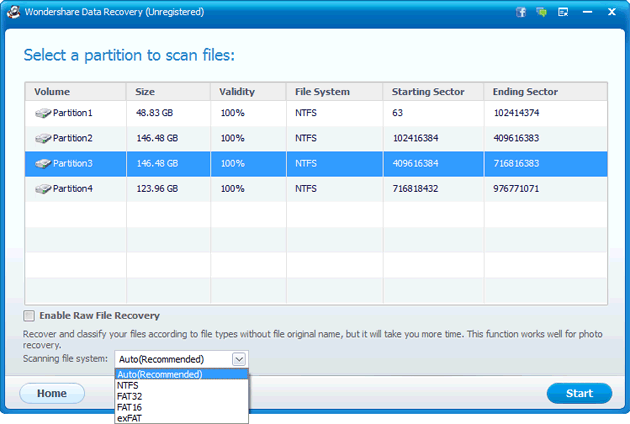
With Partition Recovery, you can find out lost, deleted, resized or damaged partition and then recovery lost files and folders from the partition.
Specify the physical drive to search partitions.

Select the found partition and set file system type to scanned lost data. 4 file systems are supported: FAT16, FAT32, exFAT and NTFS. Then click "Start" to move the recovery step which is the same as step 4 in Wizard Mode.
Raw File Recovery
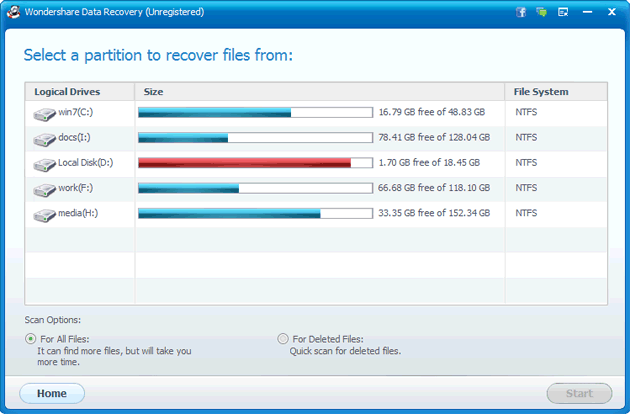
If previous scans cannot find your lost files, you can use Raw File Recovery. However, this recovery way will not display the file name and path.
Highlight the partition with lost files, and choose to scan all files or only deleted files. Then, click "Start" to move the step 4 in Wizard Mode.
Resume Recovery
"Resume Recovery" allows you to import previous scan results into the data recovery software to continue the unfinished recovery session.
Browse and import the file scanned result files (*.res) to start recovery as step 4 in Wizard Mode.

